 Killian Le Vaillant - May 5, 2025
How to securely send emails via Gmail using OAuth2 in C# .NET - a step-by-step guide
Why has OAuth2 become indispensable?
Since September 2024, Google has gradually begun removing support for so-called Less Secure Apps, which previously allowed sending email via SMTP using only a Gmail address and password. Although this method was simple to set up, it had security vulnerabilities and has therefore been disabled for new accounts.
If this option was enabled before September 2024, it is still possible (for now) to continue sending mail in this way. However, Google has not announced a final cutoff date, making this solution unstable and risky in the long term.
In this article, we will see how to create the OAuth 2.0 credentials required to send email via Gmail directly from the Google Cloud Console, and then how to integrate this authentication into a C# .NET application.
What Is OAuth2?
OAuth 2.0 is a secure authorization protocol that allows an application to access protected resources (such as sending email via Gmail) on behalf of a user without needing to know their password. Instead of transmitting credentials directly, OAuth2 uses "tokens" to validate access. This mechanism is now widely used by major platforms (Google, Microsoft, Facebook, etc.) to provide better security while simplifying the user experience.
Creating OAuth2 credentials in the dans Google Cloud Console
Before you can send emails via Gmail using OAuth2, you need to create credentials in the Google Cloud Console. Here is the step-by-step procedure:
1. Create a Google Cloud project
Go to https://console.cloud.google.com.
Click on the project selector menu at the top of the page, then click "NEW PROJECT".
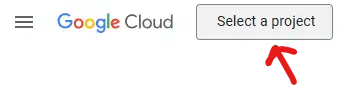
"Select a project" button

"New project" button
Give your project a name and click "Create". For this example, we'll name the project "Gmail OAuth tutorial". (Creation may take a few minutes)
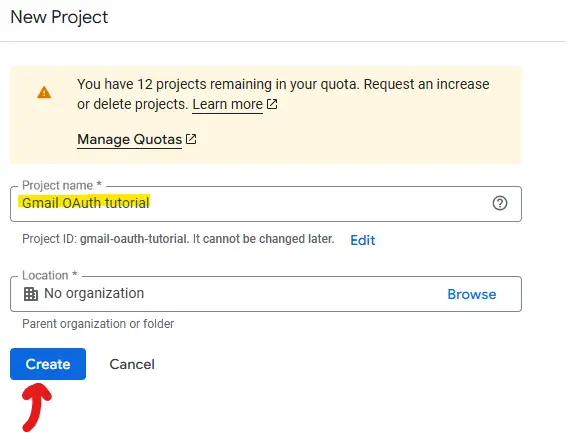
Project creation page
Once the project is created, you can select it from the project list.
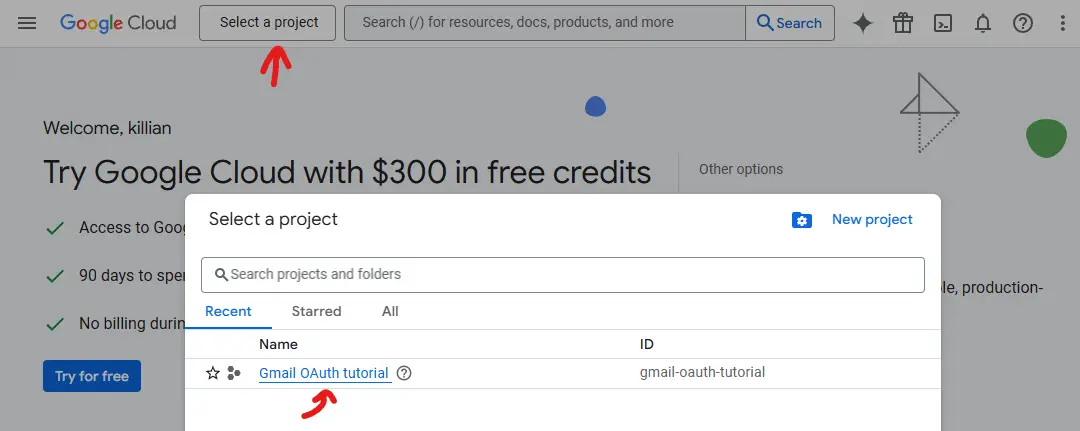
Selecting the "Gmail OAuth tutorial" project
2. Configure the OAuth consent screen
Before creating your credentials, you need to configure the OAuth consent screen. This tells Google which information will be shared with the user during authentication.
Go to the "APIs & Services" page, which you can access via the search bar.
Search for "APIs & Services"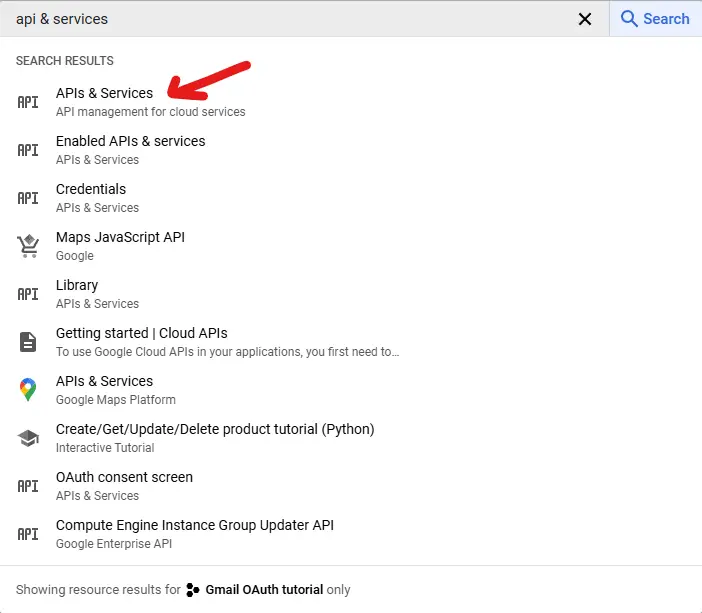
In the left-hand menu, click "OAuth consent screen".
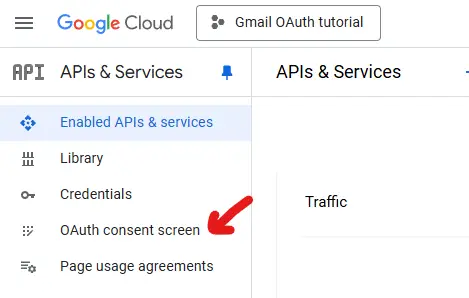
"OAuth consent screen" menu
Click "GET STARTED" to begin setting up the OAuth consent screen.
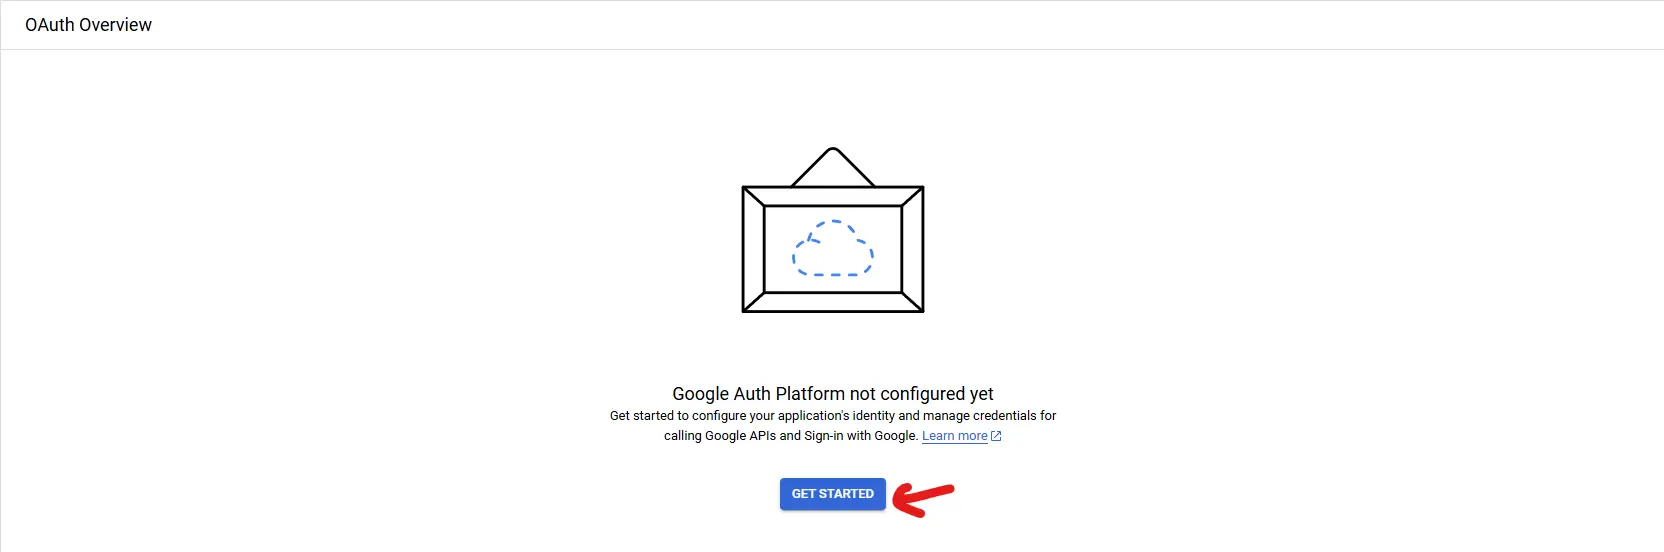
Get started screen
Fill in the requested information in the "App Information" section, then click "NEXT":
- App name: The name of your application as it will appear to the user during authentication.
- User support email: The support email address for your users.
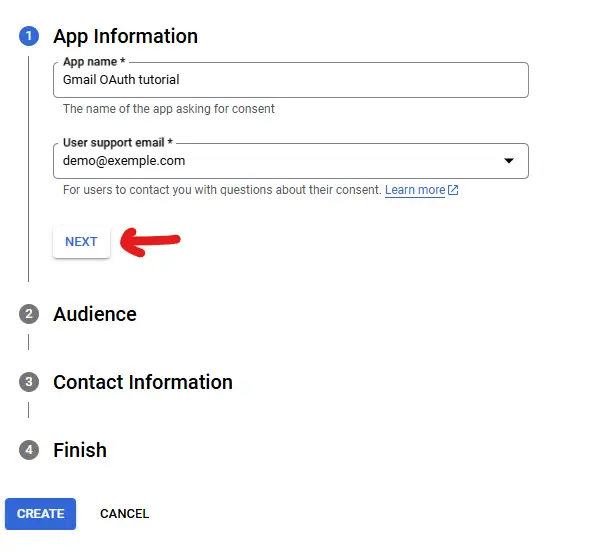
"App Information" section
In the "Audience" section, select "External".
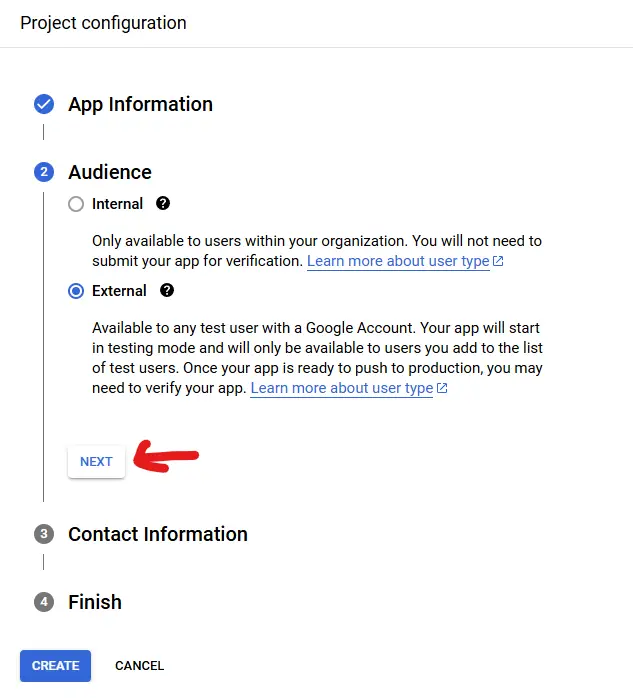
"Audience" section
For the "Contact Information"section, you can keep the default email address or add another.
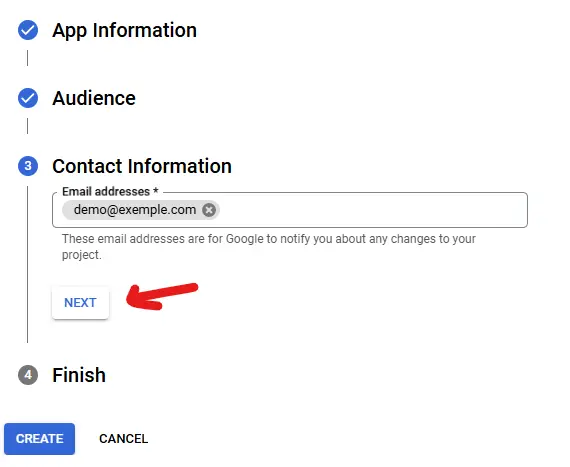
"Contact Information" section
Finally, click "Continue", then "Create" to complete the OAuth consent screen setup.
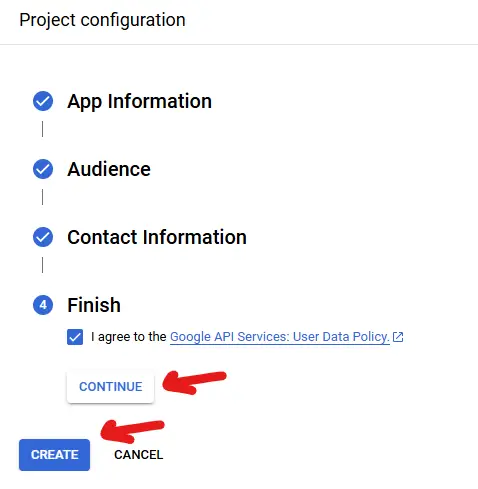
"Finish" section
3. Publish the application to production
Once the OAuth consent screen is configured, the application is in test mode. In this mode, refresh tokens expire after 7 days. This can be problematic for long-term use.
To avoid this limitation, we will publish the application to production. This notably allows obtaining refresh tokens that do not expire over time (as long as they are not manually revoked).
To publish your application:
We will now go to "Audience" and then click on "PUBLISH APP"
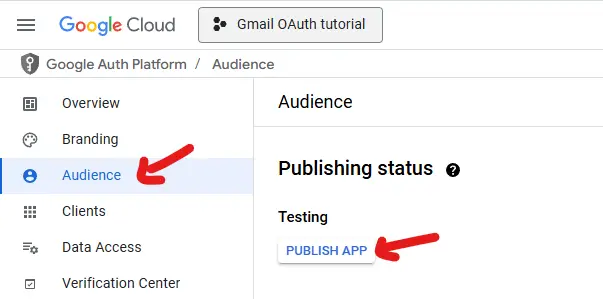
"Audience" menu with the "publish app" button
A modal will appear; you can click on "CONFIRM" to publish the application.
⚠️ As you can see in the screenshot below, a warning message outlines the conditions that require manual verification before the application can go to production. Since this manual validation can take time, I recommend meeting the criteria to avoid this step, for example, by not setting a logo.
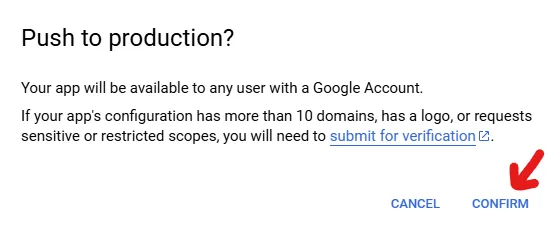
Publication confirmation modal
4. Create OAuth 2.0 credentials
Once the consent screen is configured and the application is published, you can create the OAuth 2.0 credentials.
Go back to the APIs & Services page and, in the left-hand menu, click on "Credentials".

"Credentials" menu
On the credentials page, click on "CREATE CREDENTIALS" and select the "OAuth client ID" option.
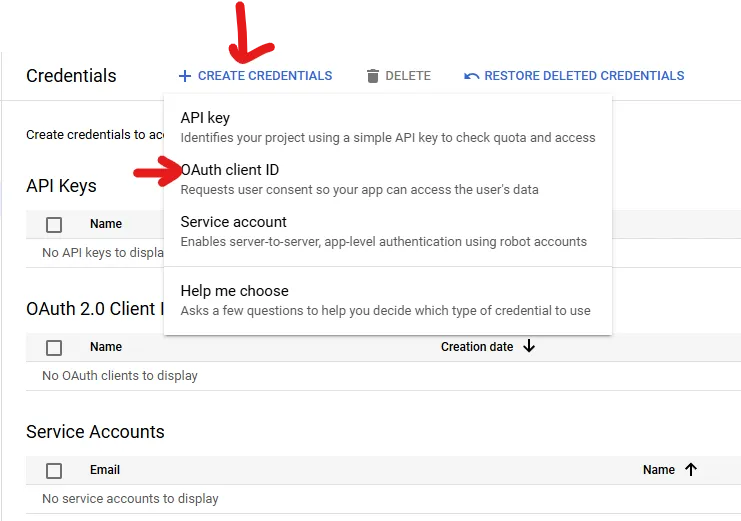
"Create credentials" menu
In the "Application type" section, select "Web application", and you may enter a name if you wish.
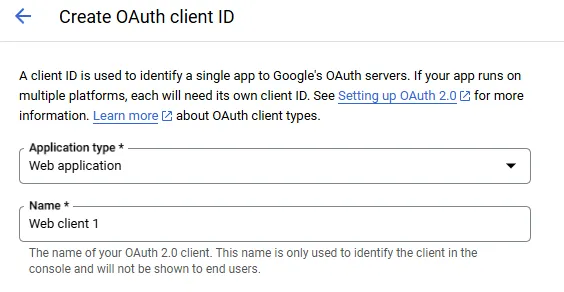
"OAuth client ID" section
In the "Authorized redirect URIs" section, add the following redirect URI: https://developers.google.com/oauthplayground. This allows the application to redirect the user to Google's OAuth Playground tool, which will make it easier to generate the refresh token.
Once you've filled in all the information, click on "Create".
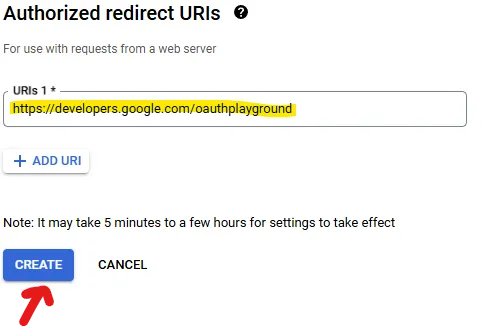
"Authorized redirect URIs" section
After the credentials are created, a window will appear displaying your Client ID and Client Secret. Make sure to note these details, as we will need them later.
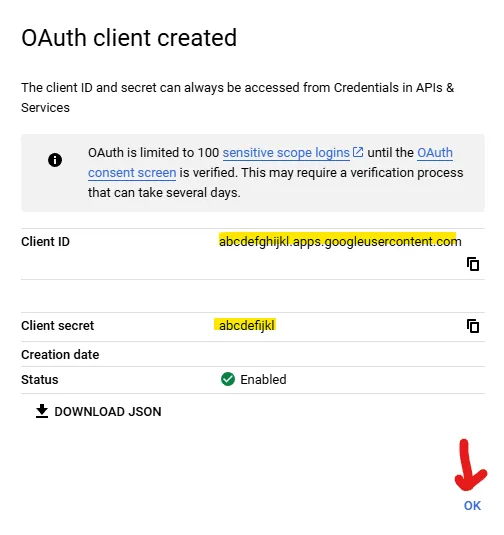
Client ID and Client Secret
5. Generate a Refresh Token
As mentioned earlier, we'll use the OAuth Playground tool provided by Google to generate a refresh token. This tool allows you to simulate a full OAuth authentication flow without having to implement it in your own application.
Once the refresh token is generated, we'll be able to pass it directly to our C# .NET application. The app will then use this token to generate access tokens on the fly, without manual intervention or requiring the user to re-authenticate.
To do this, go to: https://developers.google.com/oauthplayground/ and click on the gear icon in the top right corner of the page.
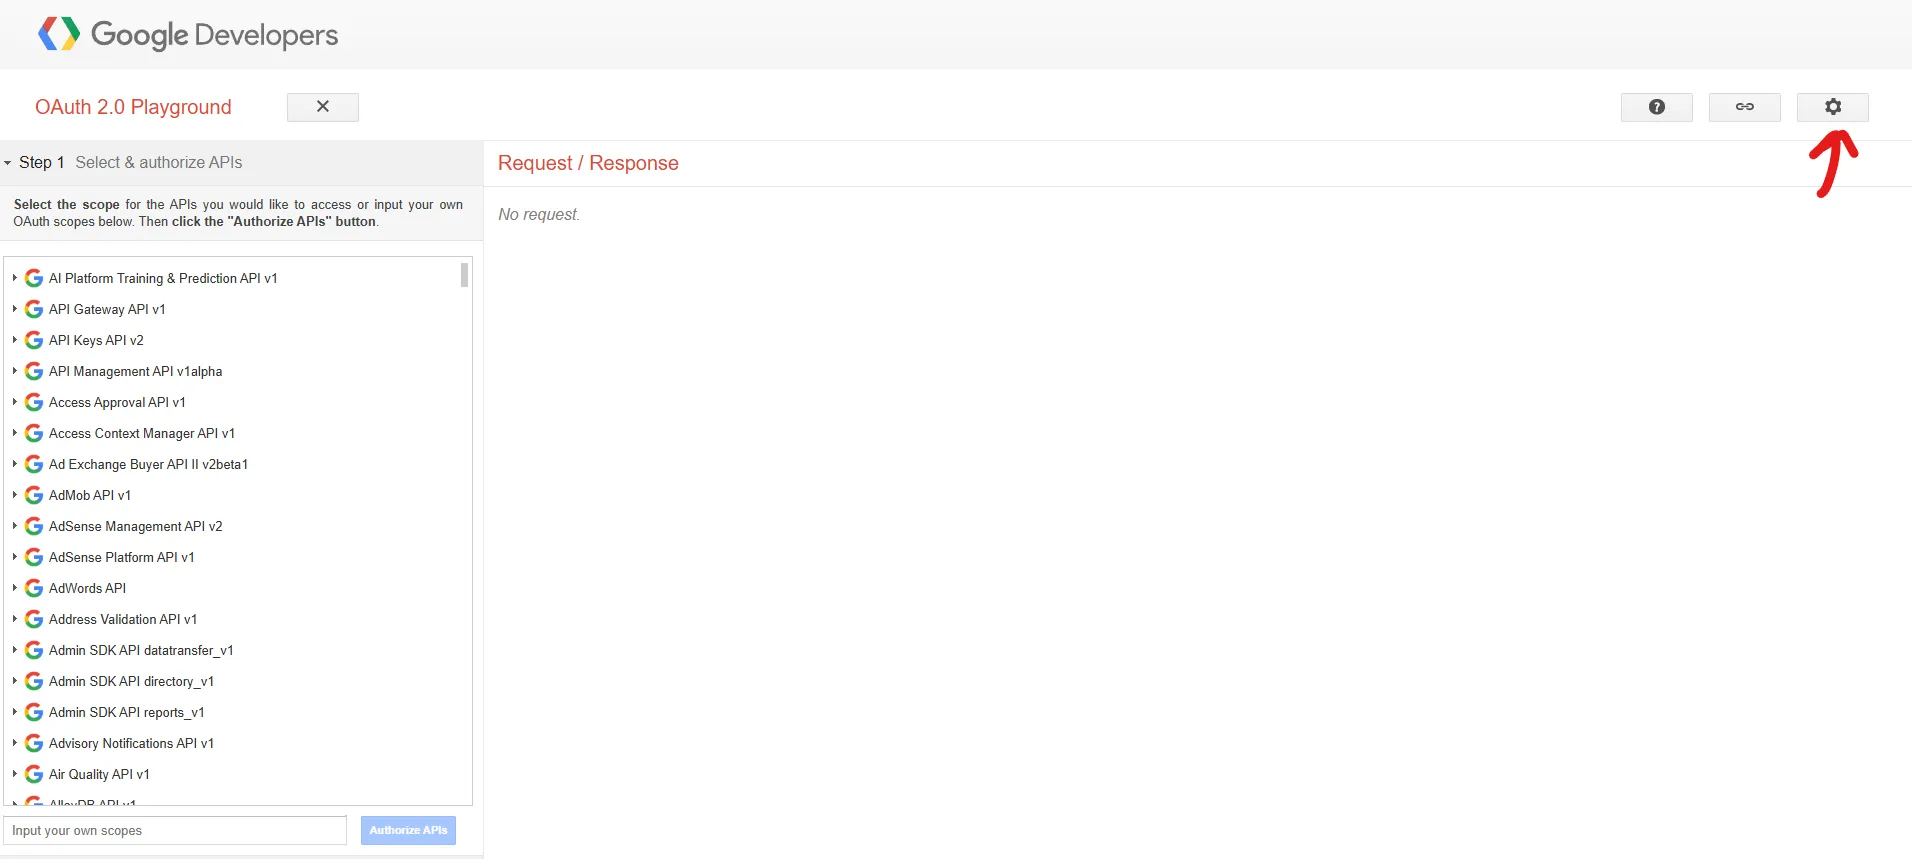
OAuth Playground home page
In the "OAuth 2.0 Configuration" section, check the box "Use your own OAuth credentials" and enter your Client ID and Client Secret that you noted earlier. Then you can close the modal.
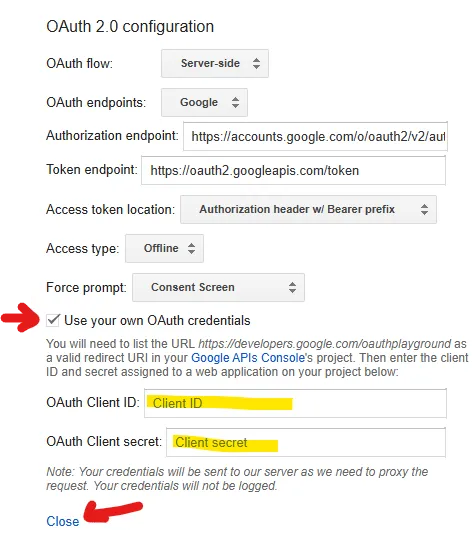
OAuth Playground configuration modal
In the input field, enter https://mail.google.com and click on "Authorize APIs".
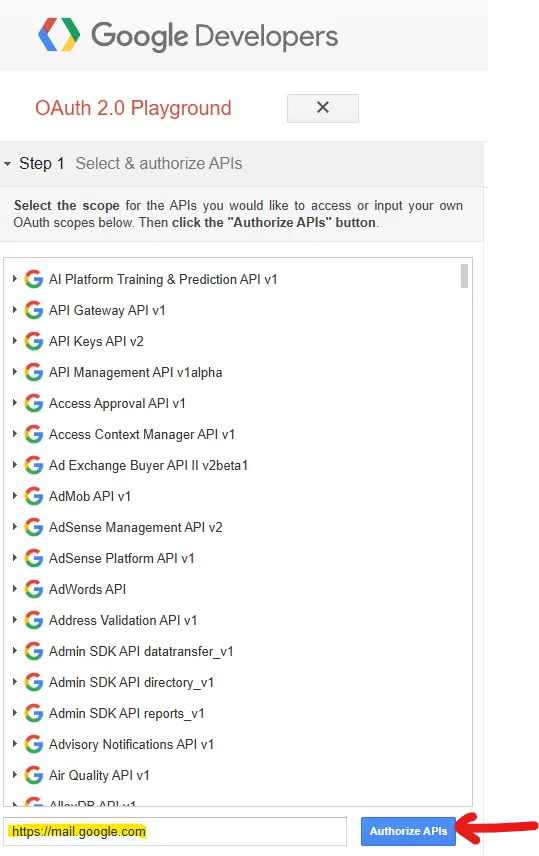
API input field
A new window will open asking you to sign in to your Google account. Log in with the Gmail account you want to use to send emails.
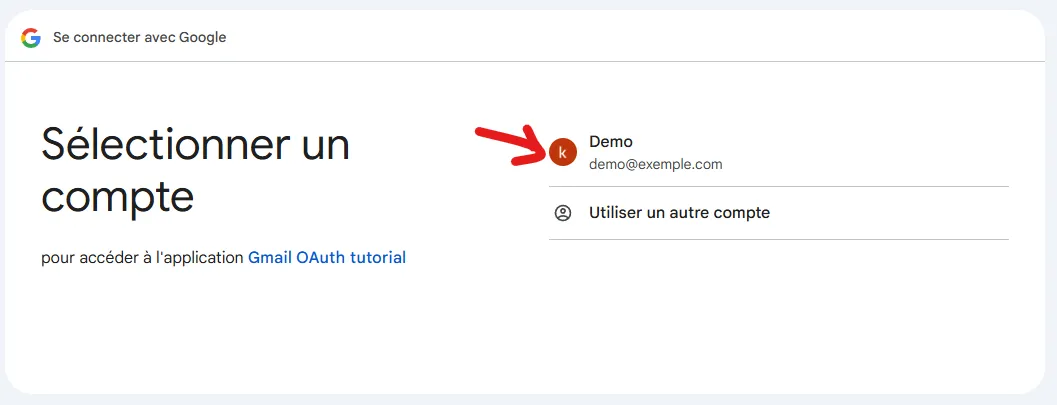
Google login page
Since the application hasn't been verified by Google yet, a warning message will appear. You can click on "Advanced settings" and then on "Go to...".
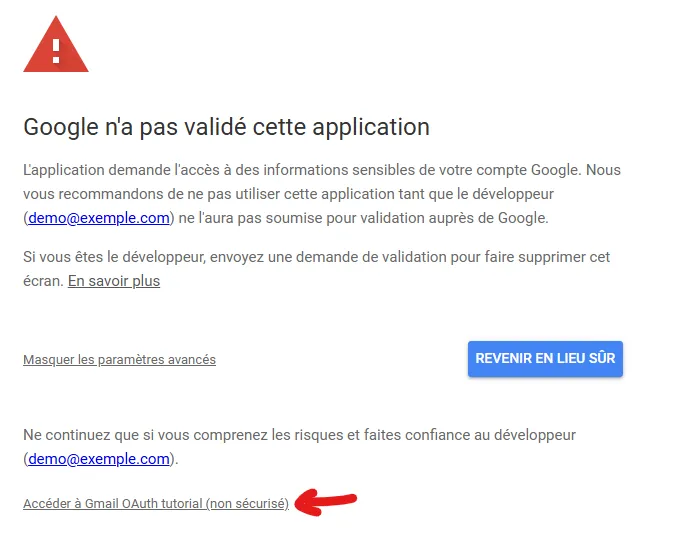
Security warning page
Once logged in, you'll see a page asking you to grant permissions to the application. Click "Continuer" to grant the required permissions.
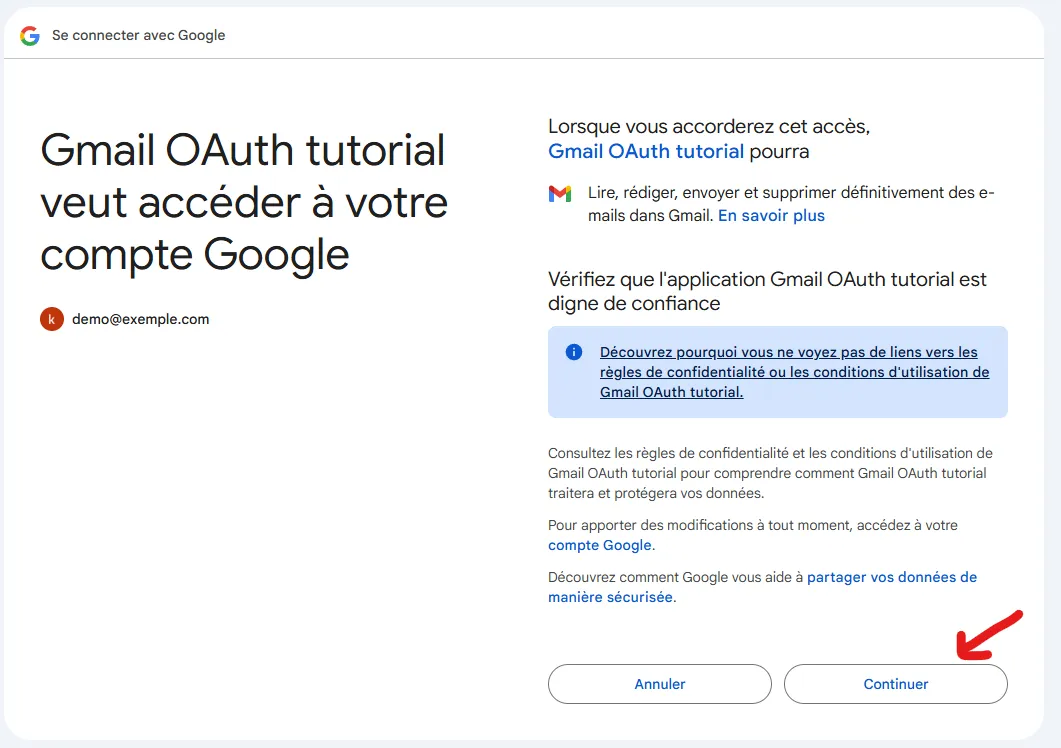
Application permission page
After granting permissions, you will be redirected back to the OAuth Playground. You will see a message confirming that the authorization was successful.
Now you can click on "Exchange authorization code for tokens" to obtain the refresh token.
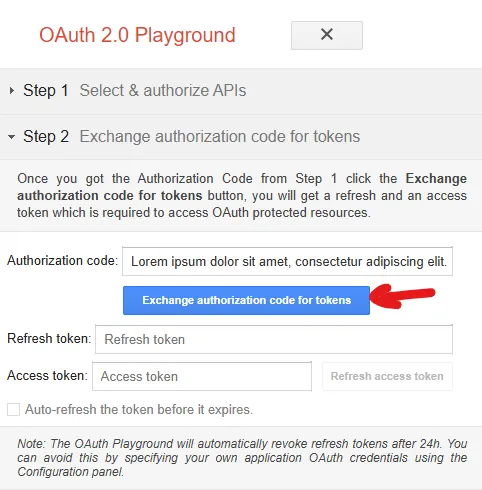
Authorization code exchange page
After clicking on "Exchange authorization code for tokens", a new section will appear showing the access token and the refresh token.
Be sure to note the refresh token, as we will need it for our C# .NET application.

Page showing the refresh token
Implementing email sending with OAuth2 in a C# .NET application
We now have the necessary refresh token to send emails via Gmail. Let's now see how to use it in a C# .NET application.
1. Install the required packages
To simplify the implementation of sending emails through Gmail using OAuth2, we will add two NuGet packages to our project:
- Google.Apis.Auth: This package allows us to securely generate access tokens from our refresh token in a way that is compliant with Google's OAuth2 standards.
- MailKit: A comprehensive library for sending emails. It significantly simplifies the setup and sending of messages via SMTP, especially when using OAuth2. MailKit also works well with standard SMTP authentication (username/password), but in our case, it will mainly allow us to send emails via Gmail using the previously obtained access token.
You can add these two packages to your project via the NuGet Package Manager Console:
dotnet add package Google.Apis.Auth
dotnet add package MailKit
If you're using Visual Studio, you can also add the packages via the graphical interface. Right-click on your project in the Solution Explorer, then select "Manage NuGet Packages". Search for the Google.Apis.Auth and MailKit packages, then click "Install".
2. Generate an Access Token from the Refresh Token
Once the refresh token is obtained, you can generate an access token on the fly within your C# .NET application.
To do this, we'll create a dedicated method, for example named GetGmailAccessToken. This method is responsible for refreshing the access token only when necessary, based on the token's IsStale property, which indicates whether it is expired or about to expire.
To avoid generating a new token on every call, we store the token in a private static property of type TokenResponse. This allows us to reuse the same access token as long as it remains valid.
private static TokenResponse? _gmailAccessToken;Here is an example implementation of this method (Replace YOUR_CLIENT_ID, YOUR_CLIENT_SECRET, and YOUR_REFRESH_TOKEN with your own credentials obtained from the Google Cloud Console and the OAuth Playground tool.):
Thanks to this method, you can easily retrieve a valid access token before each email is sent, without requiring the user to authenticate again. This is the function you'll call before using MailKit to send your emails.
3. Send an email with MailKit
Once the access token is generated using the refresh token, it's time to send an email through Gmail using the SMTP protocol and OAuth2 authentication.
To do this, we'll create a method that takes as a parameter an EmailRequestBo object containing the required information: sender, one or more recipients, subject, and HTML body of the message.
Here's the structure of the EmailRequestBo object we'll use in our example:
And for each contact (main recipient, CC, or BCC), we use the following class:
Now here is a complete example of a SendEmail method that sends an HTML email using Gmail and OAuth2:
Replace YOUR_SENDER_EMAIL with the address of the account you used to generate the refresh token in the OAuth Playground. This is the account that granted access via the Gmail API and will be used to send the emails.
This method uses the MailKit library to handle the email sending. It establishes a secure connection to Gmail's SMTP server (via STARTTLS), then uses the OAuth2 authentication mechanism with the previously generated access token.
Conclusion
Securing email sending via Gmail is now essential, and OAuth2 stands out as the modern and reliable solution to achieve this. In this guide, we covered how to:
- Create OAuth2 credentials in the Google Cloud Console and configure the consent screen.
- Publish the application to production in order to obtain long-lived refresh tokens (and avoid their expiration after 7 days).
- Use the OAuth Playground to easily generate a refresh token.
- Implement email sending with OAuth2 in a C# .NET application using the Google.Apis.Auth and MailKit packages.