 Grégory TAUDIN - Mar 29, 2022
Strapi: How to install Strapi and create a new plugin?

The new Strapi V4 plugin architecture can be used in many ways:
- You can create a pure API plugin with Strapi Server plugin: link to documentation
- You can develop a plugin with a UI and integrate it into Admin website with Strapi Admin plugin: link to documentation
- You can use your plugin to inject some components directly into Strapi Admin website: link to documentation
To cover a maximum of purpose, we decide to use all these ways to create our awesome plugin.
Let's dig into Strapi main concepts
Plugin folders structure:
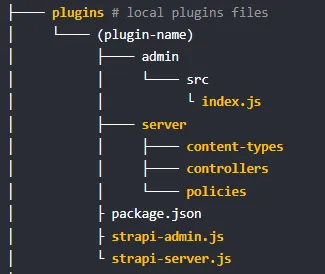
(from Strapi documentation)
Let's look at the root of plugin folder. You'll can find 2 files :
- strapi-admin.js => entry point for the "Admin panel API".
- strapi-server.js => entry point for the "Server API".
- Admin folder: includes the front part of the plugin, this is the react UI you see when you click on your plugin in the Strapi Admin website left menu. Inside you can define components, page and all stuffs you need to create an awesome plugin UI.
- Server folder: includes the backend part of your plugin. Specific Content-Type, route, controller, service, etc..
The "Admin panel API" is the front-end part customization while the "Server API" is the back-end part customization.
Often, you need the two parts to create a full plugin experience, but you can also create a plugin with only one API, it depends on your need.
What is Content-Type or Documents?
Go to your Strapi Admin website and open Content-Type builder module in the left menu.
You will find 3 categories inside it:
- Single Content-Type: Content-Type for a unique document, for example, a simple page or the template of a page.
- Collection Content-Type: Create a Content-Type to generate a collection of documents, for example a list of products or a list of blog articles.
- Components: As indicated by its name, components are small Content-Type units who can be shared in many single or collection types.
When you use Content-Type builder and create a single or collection type, you create a structural pattern to define a set of data: the Content-Type.
When you create a document who use a collection or single Content-Type. You instantiate the Content-Type template into an object: the document.
To resume, a document is an instantiation of a Content-Type, like an object is the instantiation of a class.
Installation
For this project, we will be using a Strapi template project because Strapi makes a great template project and it's a good base to start with.
Go on https://github.com/strapi/foodadvisor and download Zip or clone the project.

FoodAdvisor template homepage
Install it or unzip it. In your root folder, you have 2 folders:
- api (Strapi based app),
- client (NextJS based app).
Open a terminal inside "api" folder and use these commands:
yarn && yarn seed && yarn developExplanations:
- yarn: install project dependencies
- yarn seed: install a set of useful data into Strapi database (in our case: Sqlite db)
- yarn develop: build the Strapi Admin website and launch it on your default browser.
Once done, your default browser opens the Strapi Admin website. Fill the admin form to complete admin registration. You'll be redirect on the main page of Strapi Admin website.
/*************************** BEGIN TIPS ! ***********************/
To watch in real time your development
Go to "api/package.json"
In scripts section, add this line
"admin": "strapi develop - watch-admin"Launch your Strapi Admin website with the command below:
yarn adminNow each time you update your code the Strapi Admin website refreshes.
/*************************** END TIPS ! ***********************/
Plugin creation
In your "api" folder, open a terminal and execute this command:
yarn strapi generateThis command uses the Strapi generator, which can generate a lot Strapi stuffs:
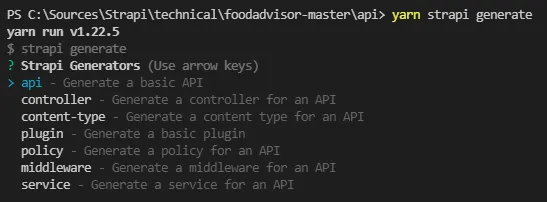
Strapi generate command
In the list of choice, choose plugin and fill the name of your plugin.
In our case: awesome-help
When command done, you will find a new "plugins" folder inside "api/src". But, if you refresh your Strapi Admin website, the plugin is not present in the menu. To resolve this issue, you need to activate the plugin in Strapi configuration.
Go inside "api/config" folder and create a new file: plugins.js or open it if the file exists.
Put the code bellow inside or add it if you already have other plugins.
Now in your left menu, you'll find your plugin!
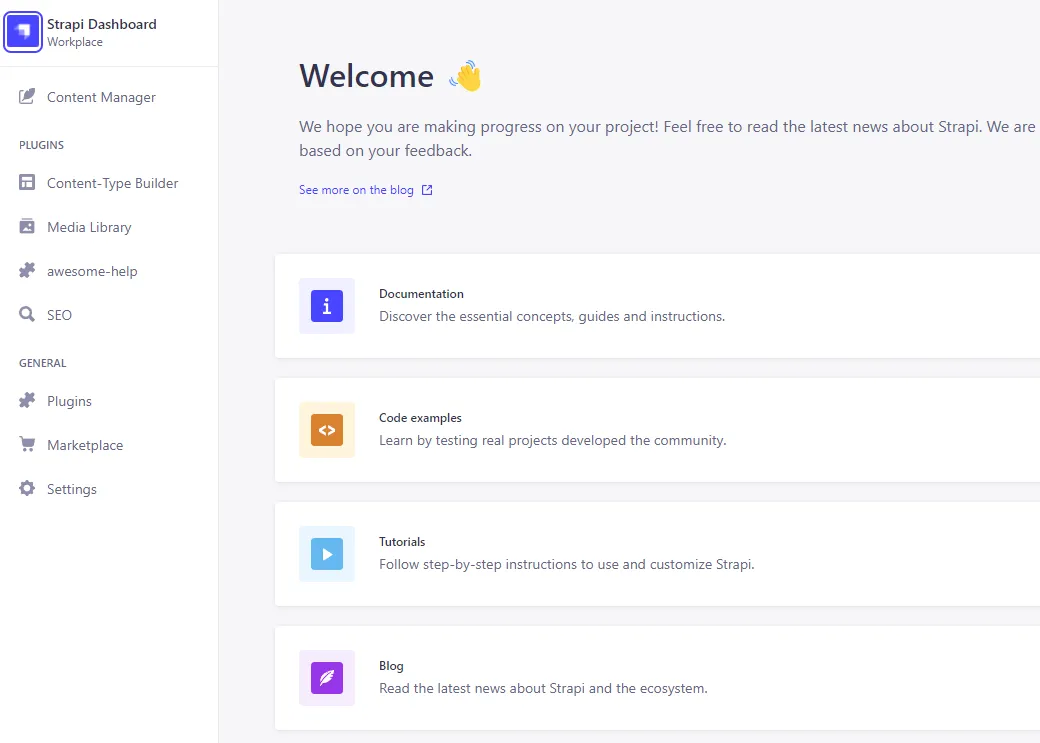
Let's update some information:
Go inside "api/src/plugins/awesome-help/package.json" file.
Find the Strapi section and update name and description properties:
"strapi": {
  "name": "Awesome Help",
  "description": "This plugin enable to create a contextual help for all fields in your documents!",
  "kind": "plugin"
}
Return to the Admin Website and wait the page refreshes. Now the name of your plugin is updated! Finally, go to the Plugins section and you will discover your plugin with the good description field.
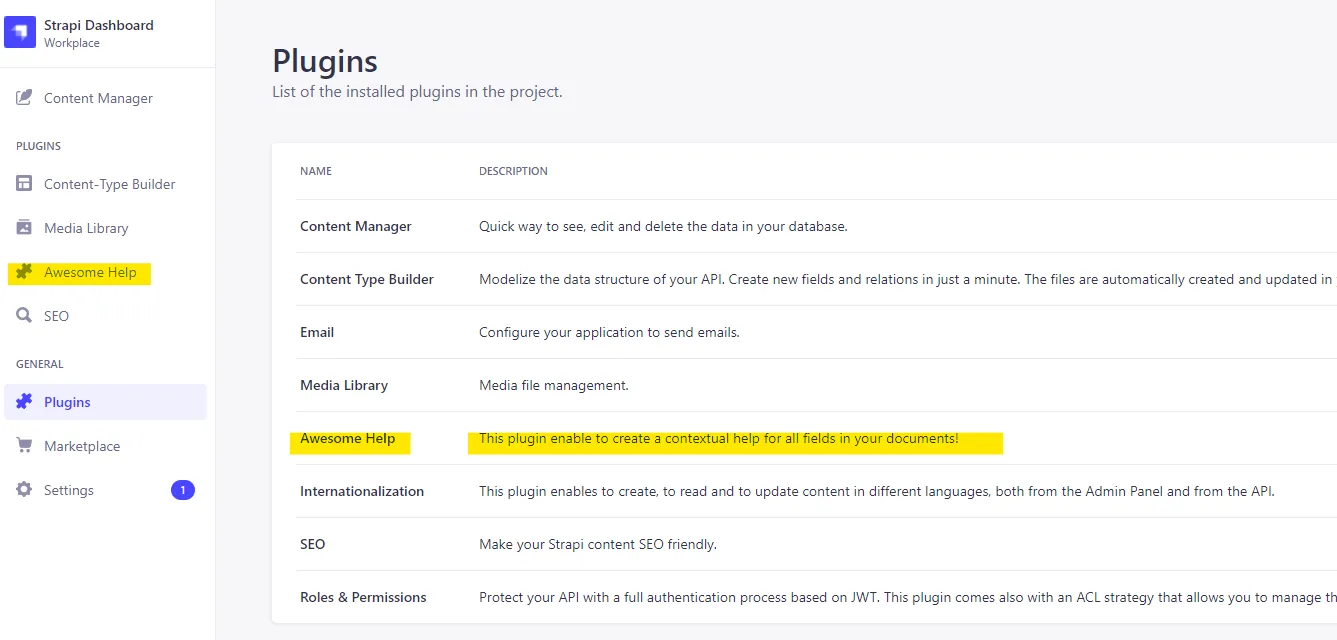
Strapi Admin website plugin page
Mission complete!
And don't forget our GIT to get the code: https://github.com/ExFabrica/strapi-stories/tree/develop/part-1
See U!