 Grégory TAUDIN - Jun 8, 2022
NestJS: The Code First approach with TypeOrm

Welcome back!
In this story, we will used the code first approach. To be simple, we will not manage the database structure creation or update. Our job is to create specific classes called "Entities" and use an ORM to convert the classes into tables. NestJS manage out of the box an ORM: TypeOrm.
TypeORM is an ORM that can run in NodeJS, Browser, Cordova, PhoneGap, Ionic, React Native, NativeScript, Expo, and Electron platforms and can be used with TypeScript and JavaScript (ES5, ES6, ES7, ES8). Its goal is to always support the latest JavaScript features and provide additional features that help you to develop any kind of application that uses databases - from small applications with a few tables to large scale enterprise applications with multiple databases.
TypeORM supports both Active Record and Data Mapper patterns, unlike all other JavaScript ORMs currently in existence, which means you can write high quality, loosely coupled, scalable, maintainable applications the most productive way.
TypeORM is highly influenced by other ORMs, such as Hibernate, Doctrine and Entity Framework.
Installation
In the main folder of the solution, open a terminal and use this command:
> npm i -g typeormNext, we need to install the NestJS wrapper and SQLite3:
> npm i @nestjs/typeorm
> npm i typeorm
> npm i sqlite3
For the configuration, we need to add a new file at the root of the project:
We use the SQLite connection and provide some information:
- type: SQLite
- Database: database name (from the NodeJS .env)
- entities: the path of entities classes.
- synchronize: synchronize all entities updates from the code directly in database.
- migrations: the path of migration files. This approach is recommended for production. Each time you update the entities classes, you need to use a command to create migration files. They contain all information TypeOrm need to update the database structure and also the rollback script if the database update process failed.
Once TypeOrm configured, we are going to create an "Entities" folder inside the shared library. This new class represents an item from an inventory.
This class contains 4 properties:
- an id,
- a name
- a description
- a power level
Notice all TypeOrm decorators, they allow to describe properties and how they are represented in the future database structure:
- @Entity() allows to define some properties in the destination table, for example, here, we specify the name.
- @PrimaryGeneratedColumn() allows to define an autogenerated id,
- @column() allows to define if the property is a column.
The entity class InventoryItem is ready, we need to import and configure TypeOrm in the shared module definition:
We specify the connector and the entity TypeOrm needs to use. Once the structure of our inventory is ready, we are going to create a service to request our new entities. On the root of project, open a terminal or reuse it and launch the command below:
> nest generate service services/inventory
? Which project would you like to generate to?: Shared.
The Nest CLI will create 2 files for us: one for the service and the other to define tests in "lib/shared/services/inventory". We are ready to code your first service:
Notice the definition of injection with the decorator @injectable(). Our service is now injectable in all the NestJS stack. Notice also, the injection of TypeOrm repository inside the constructor. We use a typed repository "InventoryItem" directly from injection.
The first function we need to code is to return all "InventoryItem" from repository. The code is simple and we just use the "find" function from TypeOrm repository.
Then we need to build the library, update the "scripts" section of "package.json" and add:
"build:shared": "nest build shared",We are going to expose our new service. Open the "shared.module.ts" file and update the section provider to add "InventoryService". Add a new entry "exports" and add "InventoryService" in the array definition. The "InventoryService" is available everywhere you import the SharedModule module through the NestJS dependency container.
The last step consists on update the reader and the writer to call this new service from theirs controllers.
Go to "apps/reader/src/reader.controller.ts" and update the code:
We dynamically inject the service in the constructor of controller and create a new function "findAll" and expose it through the @Get() decorator.
It's time to test! From a terminal, launch the reader with:
> npm run start:readerWe use POSTMAN to test:
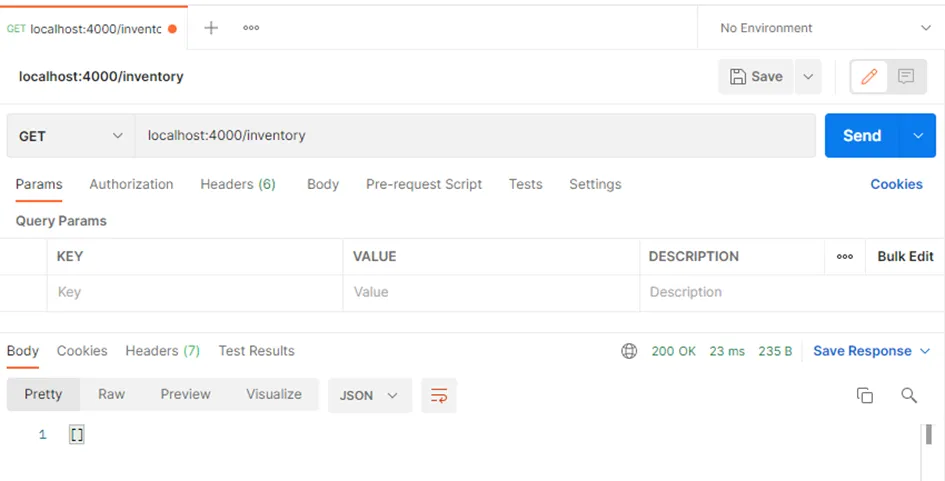
Inventory FindAll call
Notice that when the application is launched, TypeOrm creates the database inside the folder : db/sqlite
If we open the database SQLite with DBeaver for example (it's free and worked perfectly), we will find a base totally in line with the model that we have defined!
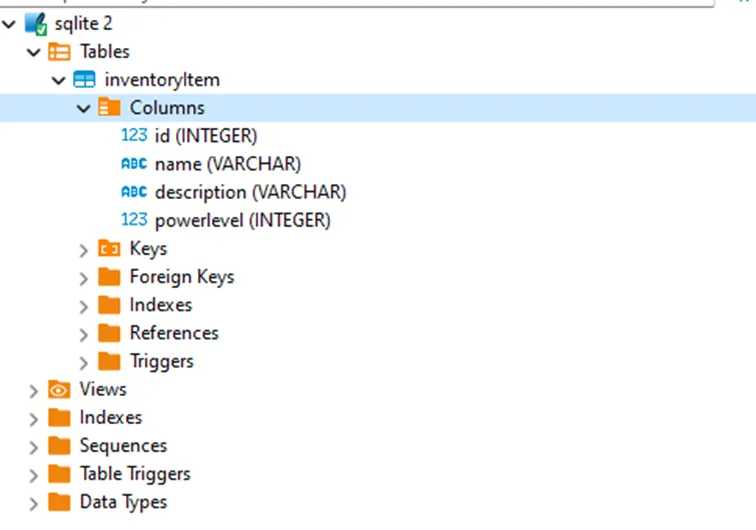
We can now populate the database with some data. It's time to make SQL:
INSERT INTO inventoryItem (name, description, powerlevel)VALUES('My First Item', 'The description of the first item', 1);Relaunch the call of the Reader API:
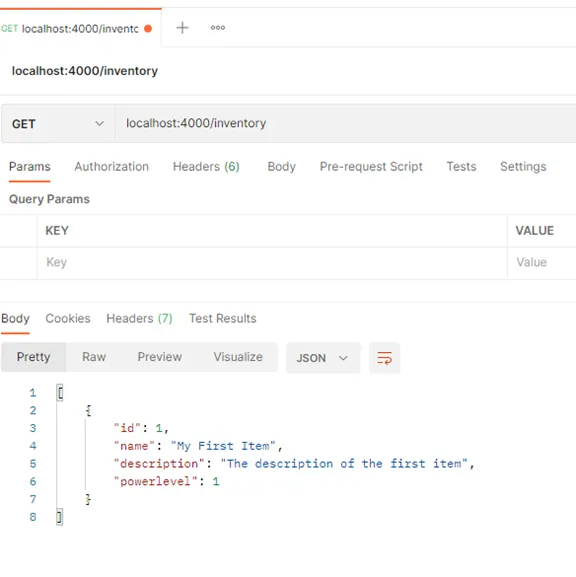
The item is now present in the response of Reader API!
Let's jump into Writer API. First, we need to update the service for adding our "create" function. A quick reminder of REST conventions for C.R.U.D. :
- C : (create) => using of HTTP POST verb
- R : (read) => using of HTTP GET verb
- U : (update) => using of HTTP PUT verb
- D : (delete) => using of HTTP DELETE verb
Let's add all new functions in the service "InventoryService":
The new async function "create" get an item from the controller parameter and saves it in the SQLite database with the repository function "save". TypeOrm can use the same "save" function for the update.
For the "remove" function, we call the "remove" function from the repository but before we control if the item exists with the call of "findOne" function. Notice the construction of the "where" condition in "findOne" function.
Then, we need to update the writer controller to call all these new functions:
We use the good HTTP verbs for the C.R.U.D operations with the @Post(), @Put() and the @Delete() decorators.
@Body() decorator allows to get directly from the request the content of the body.
@Param() decorator allows to get a parameter from the QueryString.
ParseIntPipe is a NestJS out of the box PIPE to cast the string id parameter into an int.
The code is very simple, we just call the service and catch and error if an error occurred.
Open the "package.json" file at the root of the project and add line below in the "scripts" section:
"start:writer": "nest start writer --watch",Open a terminal and launch the command. The Writer API is launched on the 5000 port.
Open an another terminal and launch the Reader API.
In POSTMAN, let's configure the post request to create an item:
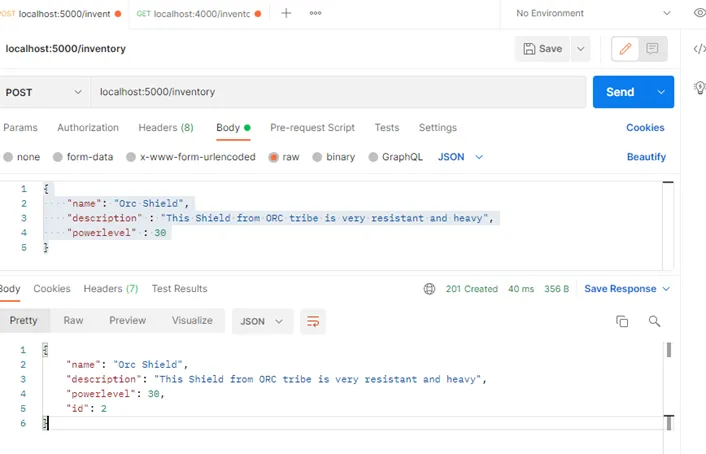
The writer API return a new item with id 2. Now let's use the Reader API to confirm the creation of the new item:
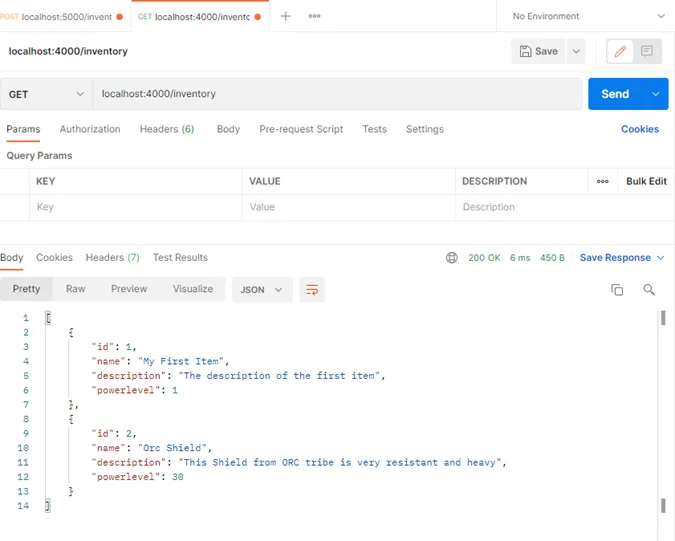
The new item appears in the list!
Perfect, the new item appears in the data from Reader API!
Mission complete!
The C.R.U.D APIS are ready and worked, we can test the solution now! We can think about the next part: Unit and E2E tests with Jest.